Showing posts with label Baking. Show all posts

Monday, July 23, 2012

Waffles


We often used to have waffles when I was a kid, so I thought I would find a nice recipe and put it here.  Quick and easy and hard to mess up.  :D

3 eggs
0,5 l milk
400 g of flour
1 tsp baking powder
1 tsp salt
1 tsp vanilla sugar
3 tbsp sugar
50-100 g cream / butter
(Some oats)
(Some lemon juice)

Whip the eggs slightly and add milk.


Add all dry ingredients:  flour and baking powder...


...and sugar and vanilla sugar.


Also mix in cream or melted butter.  I chose cream, only reason being that we didn't have enough butter.  :P


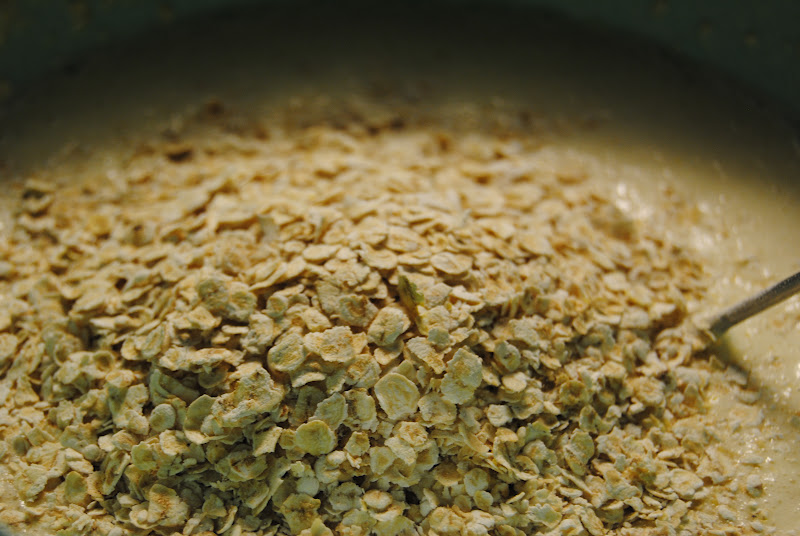
This is just my own additional step, I some times mix in oats.  I just like it better like that, you can decide to try it too, or just skip the whole thing and move to the next step. 


At this point you can leave the mixture to rest for a bit.  I left it for about 15 minutes still time, sometimes in hurry I don't, but pretty much every recipe tells to do it.  

Now is also a good time to check the texture and flavors.  If after resting the mixture is super thick, just add some milk to make it slightly runny again, if not thick enough add flour.  I added some lemon juice and bit of sugar and salt because I thought it tasted like nothing.  It all depends what you like and what you're going to serve them with.  But don't stress it won't taste like much even if it was correctly done, but at least you'll see if you added salt instead of sugar... :D

Heat up the waffle iron.


Add a little touch of butter so your waffles will come off easily when they're ready.


Add a layer of your waffle mixture


Wait till golden brown.


Lift off, add a tiny bit of butter and add some mixture again.  Repeat till none is left.

Serve waffles with pretty much whatever you feel like.  My pick was blueberries, some milk chocolate and sweet whipped cream.  Also jam, ice cream, banana and other berries work well.  Let your imagination fly!  (:


Yum,

Liisa

Thursday, June 14, 2012

Finnish baking


I'm going to give my Rotary club a presentation tonight, and I thought would be nice to bake something small for everyone to have with the coffee. So I ended up picking a Finnish recipe, and I seriously can't think of a translation for it, sorry!  :D  It's quite traditional, so if you want to try something different but pretty easy and really nice for sure, check this out!  Also works in gluten free with rice flour.  (:

I made it double, so don't freak out that yours is only half the size.  The original recipe says you'll get 20-25 serves, so I thought to make it double as I knew there were going to be 46 Rotarians.  But somehow I ended up getting about 75 serves, even though they weren't smaller or anything.  I think it's because I let the dough stay for a bit before baking (because that's what you usually do), even though the recipe didn't ask to do so.  :P

And for everyone who knows the recipe, it might not be exactly the same as yours.  Mainly because I'm on the other side of the world where the measurements and ingredients differ from what we get back home.  But same or slightly different, the result was something yummy, and for me that's enough!  (:

So lets get started!

Dough:
150 g of butter
300 g (about 400 ml) of flour
2 tbsp of sugar
½ tsp of salt
2 eggs
50 g of normal yeast (keep in mind 7g of dry yeast = 15g normal)
100 ml of milk or cream

Filling:
100 g of butter
100 g (about 200ml) of icing sugar
2 tsp of cardamom

On top:
1 egg to brush them with, pearl sugar or almond flakes

+ couple of bowls, a mixing spoon, a rolling pin, a brush, paper cups, (a strainer)

- Firstly put the dry ingredients (flour, sugar and salt) into a bowl.  Add soft butter in chunks.  


- Mix till it looks something like this.  It's the easiest to mix with your hands even though it's a bit messy. 


- Take another bowl and pour the milk or cream in it.  Warm it up in microwave till it's about the body temperature.  


- Count the amount of yeast you'll need.  7 grams of dry yeast is equal to 15 grams of the normal one, so you only need to use half the amount if you use dry yeast.  So three and a half 7g packets equal 50 g.  Don't get confused with it or you'll get yeast flavored treats.  Not nice.


- Add the yeast in the warm milk.


- Mix till there is no yeast in clumps.  If unsure you can use a strainer before pouring into the dough.  Mix it all together, this time you can use a big spoon etc.


- Add the eggs and mix them in as well.  What you end up with should look something like this.  Sprinkle some flour on the table before putting the dough there.


- Knead the dough till it gets a different texture.  It should form a rubbery ball which doesn't crack.  When ready, put it back in the mixing bowl.


- Place somewhere warm (note: not too hot so you won't burn the yeast!) and cover up with a kitchen towel and leave for a while.  You can also use warm water; just fill up the sink and put the bowl there, just be careful so that the sink is not too full and the water get into the dough.


- While waiting for the dough to expand you can make the filling.  Melt the butter in a smaller bowl, when done, add icing sugar and cardamom.


- Mix fairly vigorously, and it'll end up looking like this.  It might seem like the melted butter doesn't really mix, but just keep doing what you're doing and it'll be great.


- Check the dough; after a while the it should have expanded.


- Sprinkle some flour on the table before the dough.


- Use a rolling pin to flatten it out to a quadrangle.  If you did the kneading right, the dough will try to pull back, just be patient.  Something like half a centimeter is a good thickness, doesn't really matter though so long you're able to roll it, see below.


- Spread the filling all over.


- Roll.  My quadrangle was a good size for making two rolls. 


- Cut from between the rolls so you'll get two long, separate ones.


- Cut the roll into about 2,5 cm pieces.


- Get your paper cups ready.  Not the tiniest ones, but not as big as for cupcakes.


- The little, 2,5 centimeter rolls should fit well.  There will be a bit of space around, but that's fine because these will expand in the oven as well.


- Get a tray-full of them ready. 


- Brush with egg to make them shiny and to stick any decorations.


- The Finnish way is to put pearl sugar on top of them, but as it's hard to get in Australia you can use almond flakes or just let your imagination go wild!


- Bake in 200-210°C oven for about ten minutes.  The baking time varies depending on your oven, but when they are golden brown and look baked, it's time to take them out.


TADAA!  Ready for yourself and friends or family to enjoy! (:


Enjoy,

Liisa

Thursday, April 5, 2012

Truffles


Some baking again, this time for my host family for Easter.  (:  This is probably the easiest recipe I've ever seen, and quite quick as well.  But  at the same time a really nice thing to take to some one or just enjoy yourself...  ;)

You need:
300 g of chocolate (milk, dark or white, whichever you like the best)
100 ml of cream
1 tbsp of icing sugar
20 g of butter
+ something to decorate them with


- Put all the chocolate and the cream in a bowl and melt them.  The easiest way is to place the bowl on top of a saucepan which has water in it, put the whole thing on a stove and just stir occasionally while the chocolate is melting.

- After it's all melted let cool down a bit before adding the icing sugar and butter.  Then refrigerate till firm.


-  If you want to use little paper cups, get them ready!


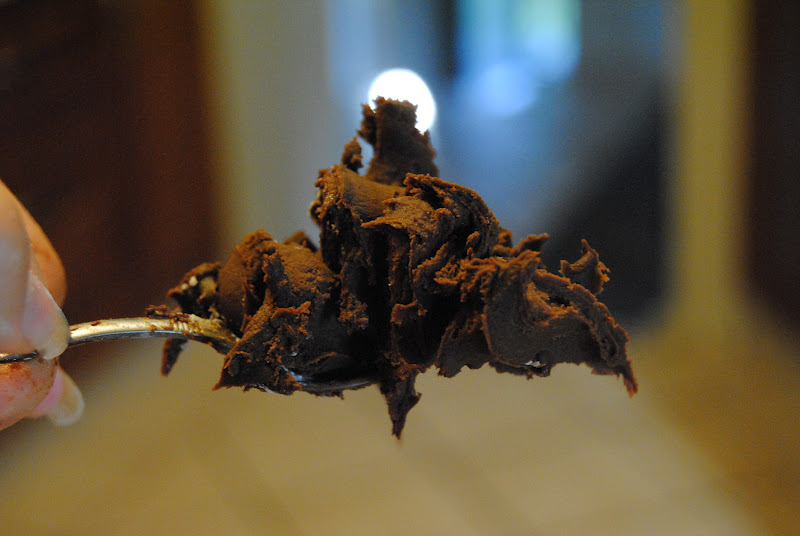
- When the dough is fairly hard, take about a teaspoon and roll it into a ball.  (This photo is not demonstrating my teaspoon, just showing that it'll become quite stiff.  :P)


- Roll your truffle in the decorations you've picked.


- Tadaa!  Done.  Easy as.


- If you're giving them away as a gift you might want to wrap them nicely. 


Sweet Easter,

Liisa

Thursday, December 15, 2011

Gingerbread house


Finally!  Day before yesterday I told you how to make a gingerbread dough. Today I'll show you how did I construct a house from it.  There are million ways to do this, so this is just one of them; my way.

- Cut the pieces of out from baking paper first if you feel like you'd like little help when cutting different shapes from the dough (this is good thing to do, because if the pieces are unequal it'll make it hard to stick them together).   So there are 5 different pieces, and you'll need two of all of them!
> The piece on the up left is the wall (13cm x 8cm)
> The bottom left is the roof (17cm x 9cm)
> The bottom right is the other wall (10cm x 8+4cm)
> The little square in the up right corner is a  chimney (3,5cm x 3cm)
> And the last one next to it is the other chimney part (4cm x 3cm)


- Then use the rolling pin to make the block flat, 3mm might the best thickness.


- Use your baking paper pieces to help when cutting out the shapes from the dough.  You don't have to, but if you want to you can cut small windows to the walls.  And don't forget the door, I did! :D


- Heat the oven to 200°C.


- It's a good idea to put the big and small pieces into the oven separately; otherwise the small ones will be burned while some big ones might still not be baked.


 - Let the pieces cool down first.


- From the rest of your dough (should be almost one block left) you can make a random shaped huge gingerbread, which you are going to use as a base to your house.

- Pour some sugar onto a frying pan and melt it.  This is going to be your 'glue' to make the pieces stay where they are supposed to.  Don't melt too much at the time, because I can almost guarantee that your sugar will be badly burned (that means it tastes bad) before you are done with all the gluing.


- Start from the walls.  Try to place them as equally as you can, so gluing the roof will be as easy as possible.


- After walls and roofs, place the chimney and the shutters.  It doesn't matter if it doesn't look perfect yet, you have plenty of opportunities to make it the most amazing gingerbread house by decorating it in the way you want.


 - There are plenty of options for this as well, but I use the mixture of icing sugar, water and lemon juice.  Just be careful that you only mix couple of drops of water; otherwise your mixture will be too watery and keep coming down without getting hard.  The drops of lemon juice are just to make it taste nicer.  Put the mixture into a small plastic bag and cut a tiny hole to one of the corners.


- Just use your imagination!!! :)


One more assessment to go and I'm officially on holidays,

Liisa

P.s. I'm off to Newcastle tomorrow morning, and I'll be back on Saturday night.  There's a great meeting coming with some my favorite people!